First Task
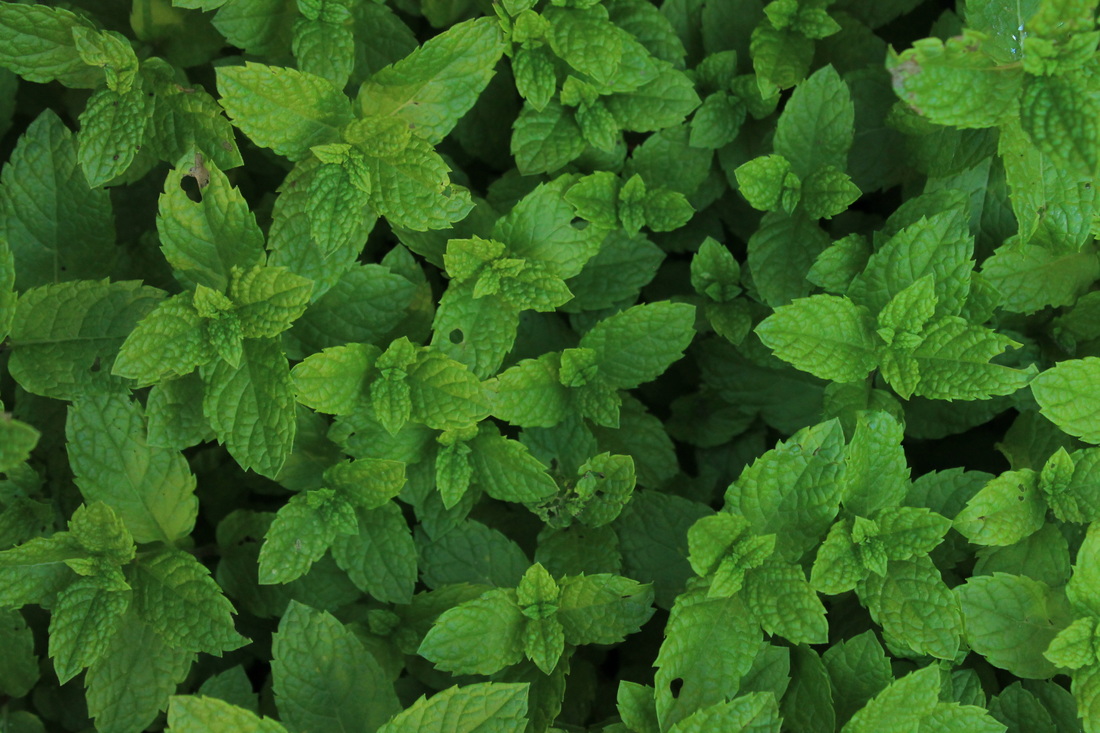
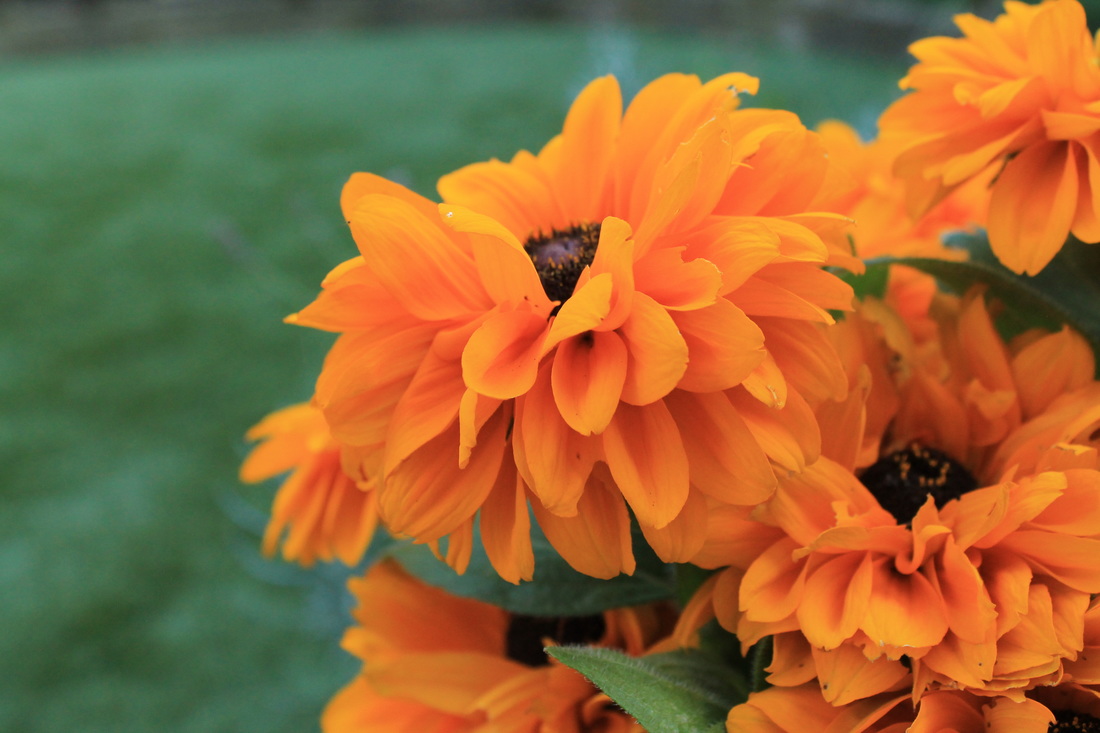
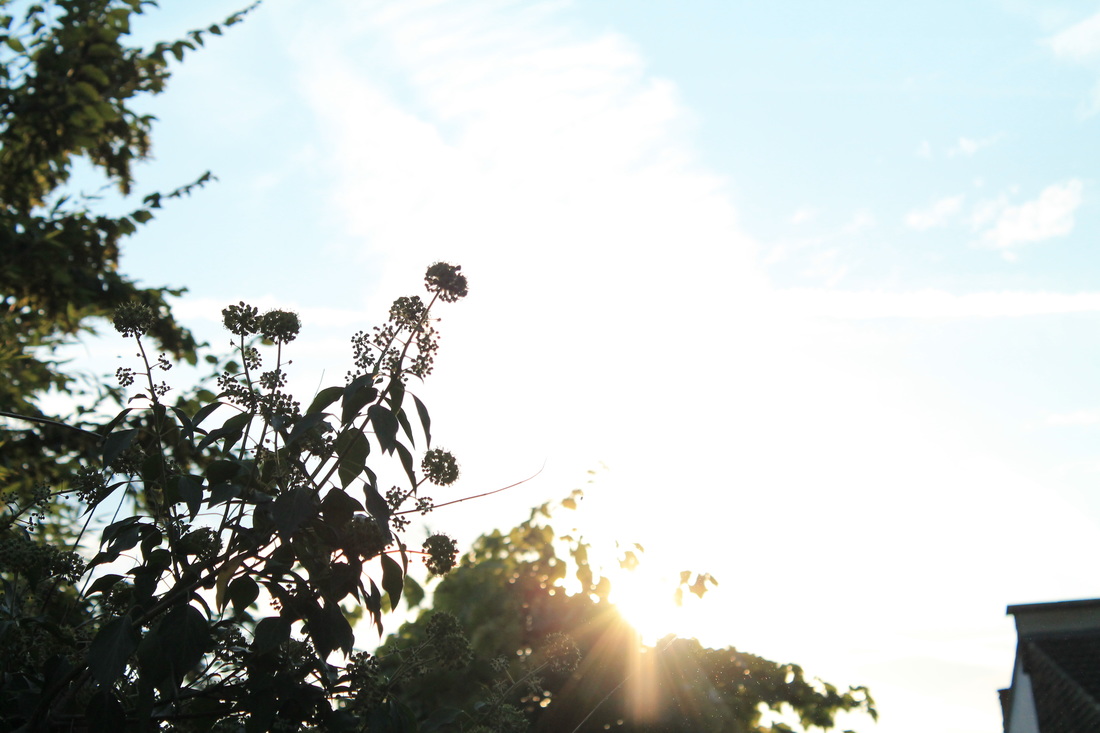
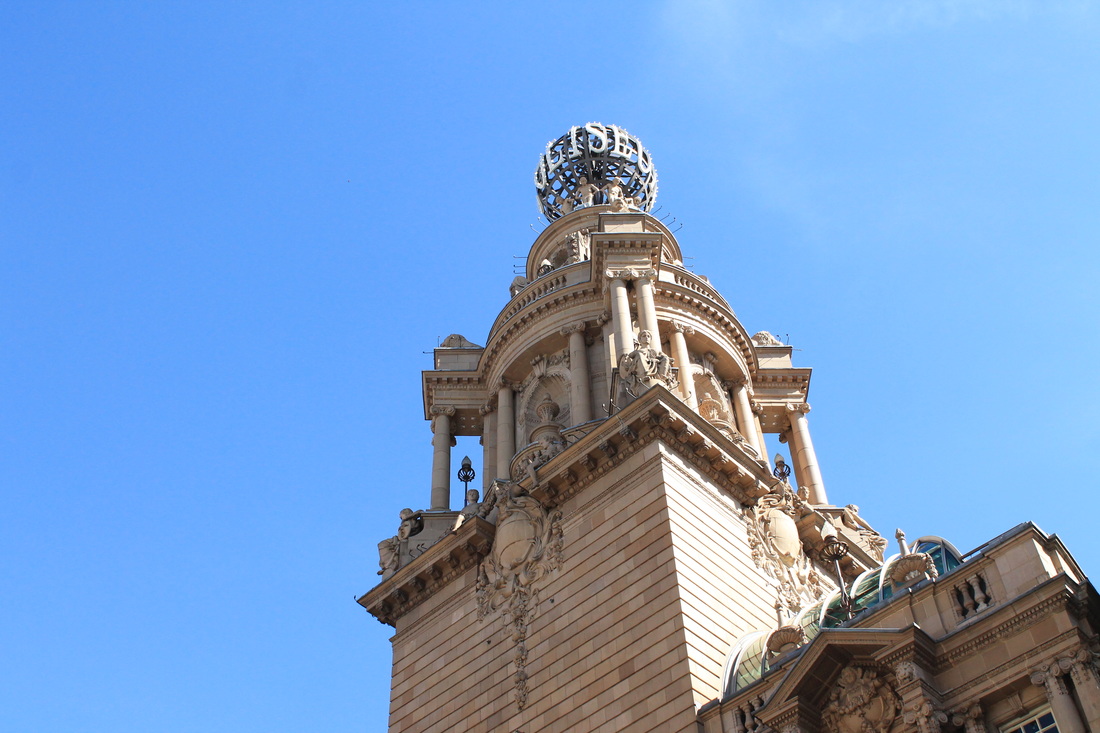
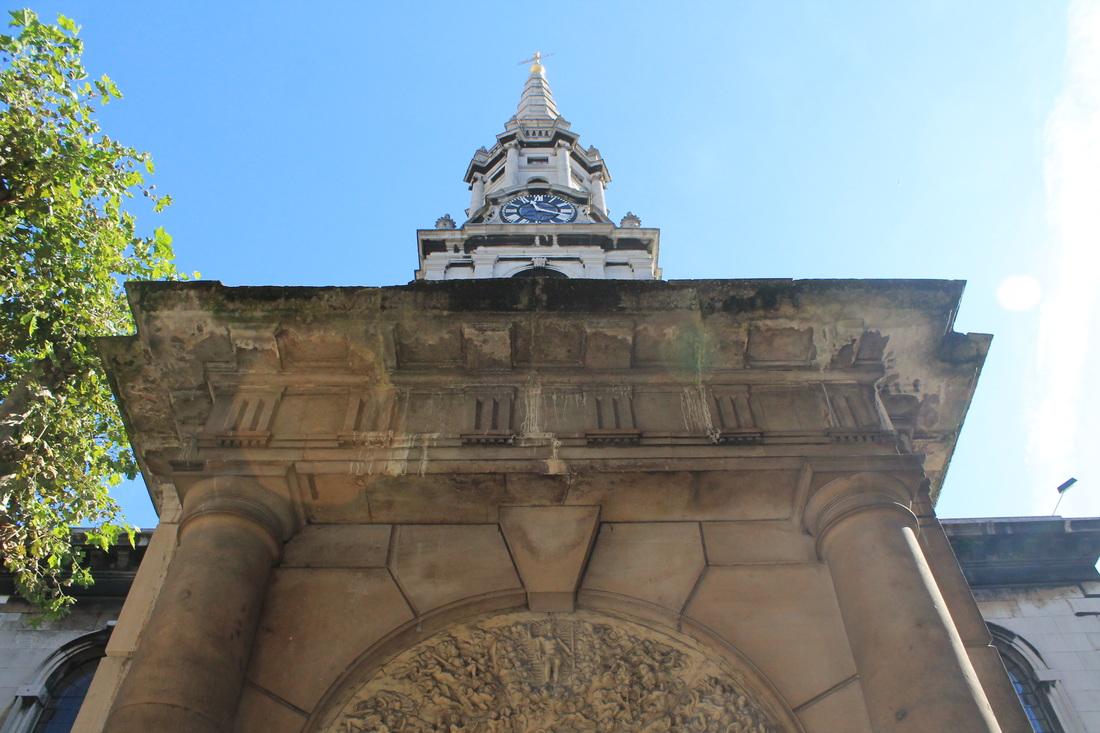
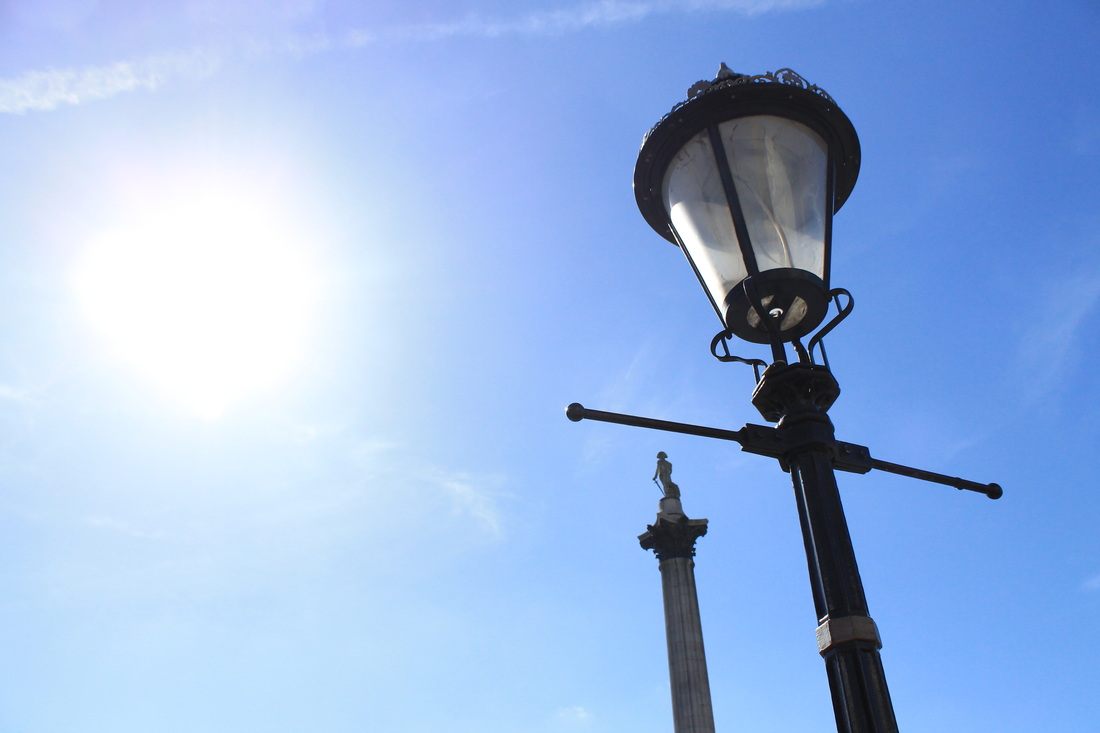
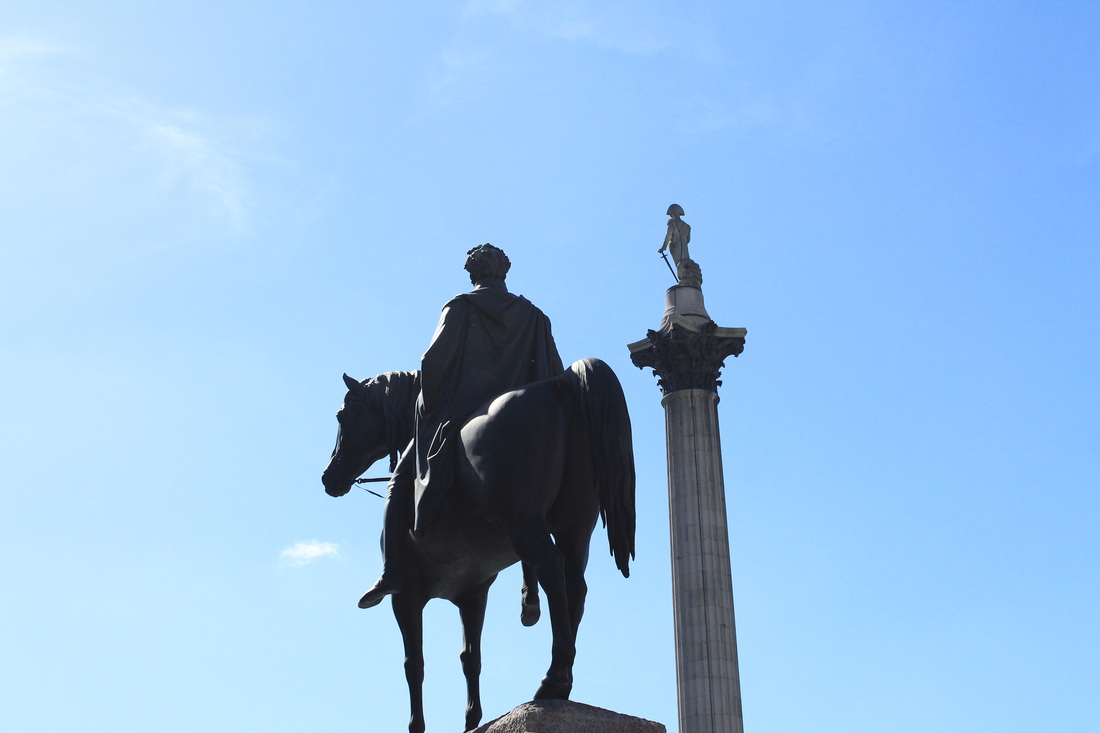
I was tasked with taking a series of 10 images of branches of photography that interest me. For this task, I took a set of photos of London's urban landscape, mainly in and around Soho Square. Urban photography inspires me; I love to look at the detail and awe inspiring presence of different types of architecture, whether it be huge, modern structures such as the Shard or smaller creations such as a finely detailed statue. I also took some photos of nature and natural landscape. Nature often inspires me, as I find the different patterns, textures and colours hidden within plants, trees and landscapes fascinating to look at.


history of photography
16th century
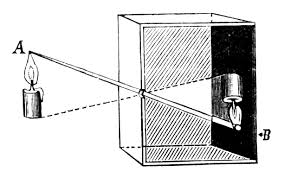
Artists during the Renaissance became extremely interested in exploring the reality of nature. The search for realism allowed artists to develop various instruments in their quest for the 'perfect perspective'. One tool that was developed was known as the camera obscura, a dark room with a tiny hole in the wall in which an image was projected on to a surface.
|
As camera obscura technology improved in the 16th century, camera obscuras became portable boxes which incorporated lenses and mirrors, so that the image was reflected onto a viewing surface which was visible outside the box. Portable camera obscuras were used as aids for draughtsmen and painters.
|
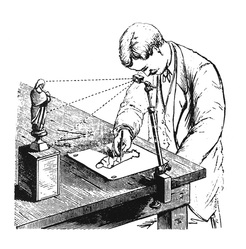
As technology continued to develop, smaller instruments were invented such as the camera lucida, which was used as a portable optical device used as a drawing aid by artists.
|
The camera lucida was an instrument in which rays of light are reflected by a prism to produce an image on a sheet of paper. This allowed the artist to see both the image and drawing surface simultaneously, resulting in a far more accurate drawing of a scene. This created more 'realism'.
|
|
19th century
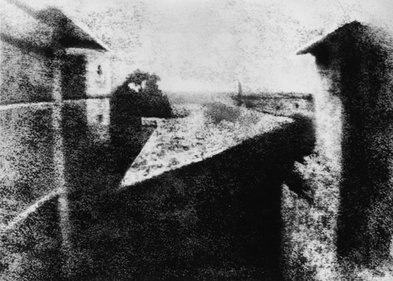
The Industrial Revolution transformed life in the 1800's due to further technological enhancements. The goal for scientists was to capture 'realism' properly; to reproduce reality in a fixed format. Finally, in 1827, a scientist named Joseph Niepce succeeded in fixing the first projected image, a view taken from his window in Southern France.
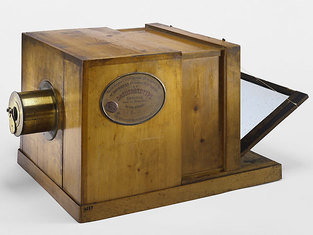
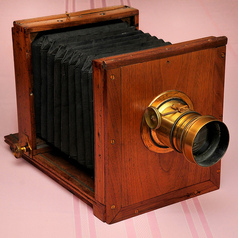
Louis Jacques Daguerre, a man who helped Niepce to capture his first image, later went on to create the Daguerreotype in 1839, a type of photograph which was laterally reversed and monochromatic printed onto a metal plate. Around the same time, an Englishman named William Henry Fox Talbot developed another type of photograph known as the Calotype. This type of photograph had a distinct advantage over the Daguerreotype, which was that the Calotype could be reproduced as a negative as opposed to just being a singular, unrepeatable image.
|
The Daguerreotype
|
The Calotype
|
Henry Fox's Calotype fared far better when it came to mass production. However, despite the Calotype's versatility, the picture quality was far less impressive than the Daguerreotype's. This made it less popular in the early years, especially since most European countries and the USA had adopted Daguerre's process. However, as technology evolved over time, the Calotype was improved due to better processing due to advances in paper technology. The Calotype quickly became more popular and is still the foundation for photographs today.
The Photograph - Graham Clarke : Chapter 1
'Whenever we look at a photograph, we look at something which no longer exists' - Roland Barthes
The first chapter of 'The Photograph', entitled 'What is a Photograph?', explores the history and roots of photographic processes which ultimately led to the creation of the first ever 'Photograph' by Joseph Niecpe in 1826. The book also covers the story of the first genuine photographic negative process: the Calotype, produced by William Henry Fox Talbot.
As well as this, Graham Clarke provides a fascinating insight into the philosophy of photography.
Defined as 'light writing', the photographs power and representation of a single moment is conveyed throughout chapter one, with Clarke saying that the photograph provides a window into a 'dead world'. He goes on to state that the photograph is 'a distinctive cultural product which reflects a culture's way with the world'. The book also provides a distinction between the art of photography and as a mass produced object e.g. difference between meaningful and powerful photograph and photos taken on a family holiday.
I really enjoyed reading 'The Photograph', as it helps to set what we do in the wider context of art in general. I think it provides a unique perspective on art and photography in general, and criticises photography as almost being too accessible. I liked reading about Clarke's personal beliefs and his clear admiration of Roland Barthes' philosophical ideas about what the photograph signifies.
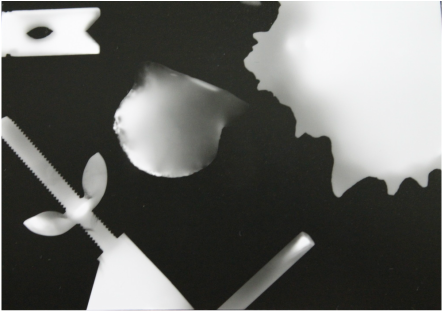
Photograms
A photogram is an image made without a camera by placing objects directly onto the surface of a light-sensitive material such as photographic paper and then exposing it to light. The result is a negative shadow image that shows variations in tone that depends upon the transparency of the objects used.
Process
Step 1: First take a piece of photographic paper which is coated in a chemical that turns black when it hits white light.
Step 2: Then go over to an enlarger. An enlarger is a machine that projects light onto a specific area below and also has a safe light filter that won't react with the photographic paper if the light touches it. Place the safe light filter over the enlarger so if it turns on then the paper won't react to the light.
Step 3: Next, find some objects to place over the photographic paper. The surface of the photographic paper that is being covered by the objects will stay white while the exposed area will turn black.
Step 4: Now take away the safe light filter and turn on the enlarger for a couple of seconds before turning it off again.
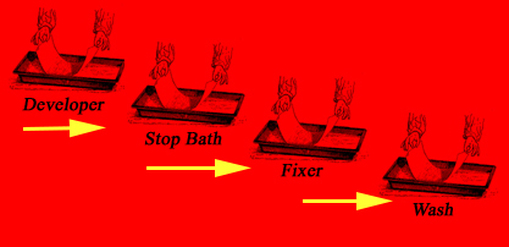
Step 5: Finally, put the photographic paper through three chemicals. The first is the developer; the developer is the chemical that brings out the image on the paper. The paper should be left in there for 3 minutes. The second is the stop; the stop is the chemical that stops the developing process. The paper should be left in there for 30 seconds. The last chemical to put the paper in is the fix, which retains the image on the paper so it won't disappear when exposed to white light. The paper should stay in the fix chemical for 3 minutes. After, take the photographic paper out of the fix chemical and then wash off any remnants of the chemicals on the papers surface by putting it in water.
Step 2: Then go over to an enlarger. An enlarger is a machine that projects light onto a specific area below and also has a safe light filter that won't react with the photographic paper if the light touches it. Place the safe light filter over the enlarger so if it turns on then the paper won't react to the light.
Step 3: Next, find some objects to place over the photographic paper. The surface of the photographic paper that is being covered by the objects will stay white while the exposed area will turn black.
Step 4: Now take away the safe light filter and turn on the enlarger for a couple of seconds before turning it off again.
Step 5: Finally, put the photographic paper through three chemicals. The first is the developer; the developer is the chemical that brings out the image on the paper. The paper should be left in there for 3 minutes. The second is the stop; the stop is the chemical that stops the developing process. The paper should be left in there for 30 seconds. The last chemical to put the paper in is the fix, which retains the image on the paper so it won't disappear when exposed to white light. The paper should stay in the fix chemical for 3 minutes. After, take the photographic paper out of the fix chemical and then wash off any remnants of the chemicals on the papers surface by putting it in water.
Test Strip

Second Response
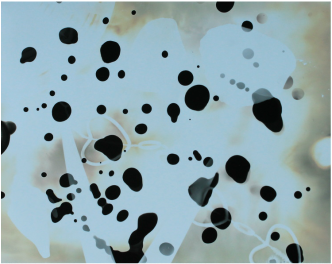
Painting With DeveloperAfter photographic paper has been exposed, paint with the developer liquid in a pattern of your choice until an image forms. Do not place the whole of the paper down into the developer chemical.
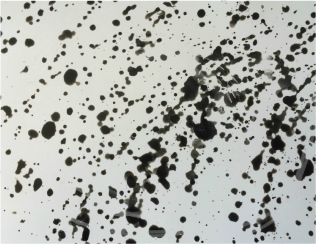
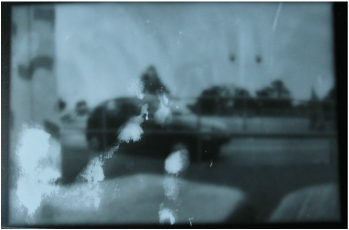
ExperimentAfter exposing the paper, I decided to paint the paper with the developer chemical and then place the paper straight into the fix chemical. The result was several brown marks around the paper which showed the objects that had been exposed on the paper beforehand.
|
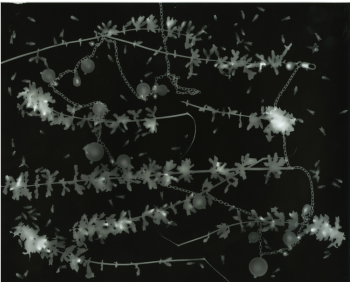
Double ExposureAfter photographic paper has been exposed, rearrange the objects and expose again. This can be done multiple times.
SolarisationAfter the photographic paper has been exposed immediately place the paper in the developer liquid until images form. After the image has formed put it back under the enlarger and turn the light on for 2-3 seconds and the appearance of the paper should change.
|
Pinhole Camera
A pinhole camera is a simple camera without a lens but with a tiny aperture, a pinhole – effectively a light-proof box with a small hole in one side. Light from a scene passes through the aperture and projects an inverted image on the opposite side of the box, which is known as the camera obscura effect. We put photographic paper inside a tin we used as the camera and made sure than all light was blocked out using masking tape and black card. There was a small hole which was exposed to the light for 5-10 seconds depending on how big the hole was. After the paper was exposed to the light, the hole was covered and the photograph was taken into the darkroom to develop.
|
|
Artist Section - Patrick Caloz
|
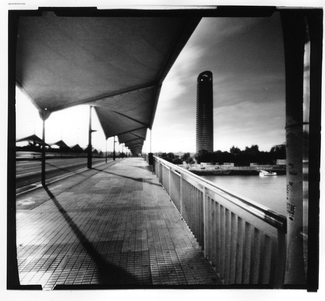
This image was taken in Seville, and displays an empty bridge path leading into a city. There appears to be movement on the road, as there are streaks of light on the far left side of the photo showing possible movement from cars or people, caused by a long exposure. The emptiness of the foreground give the photo a mysterious and effective atmosphere, which is further added to by the unusually shaped roof. The lone building in the background also adds to the desolate quality of the photo.
|
|
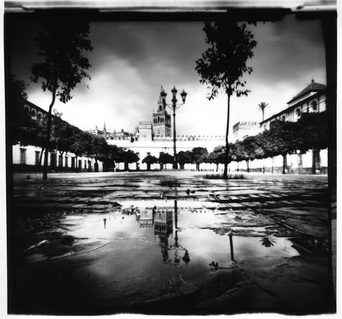
This photo is taken of the Patio de Banderas also in Seville. Similarly to the photo above, this image is given a lonely, desolate atmosphere by the lack of people in the foreground of the photo. The image shows a bare courtyard, surrounded by trees, and in the background, displays a palace like building. I like how the trees surrounding the courtyard all appear symmetrical to each other, as it makes the landscape appear more orderly. I also like how the puddle right in the foreground of the photo reflects the background of the photo, so the palace appears not only in the background but is shown in the foreground also.
|
|
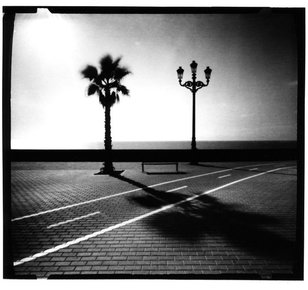
This photo is taken in Cadiz, Spain, and is my favourite image of the three that I chose. I like the simpleness of the image, with only 3 objects in the photo to focus on: a tree, a lamp-post and a bench. I find that it doesn't have the same mysterious, desolate atmosphere as the other 2 photos, despite the recurring theme in the artists images of not including people. The interesting use of the trees shadow and the setting of the image (as well as its combination of objects) give the photo an almost exotic feel. However, the photos simple nature doesn't give it the same complex layers as the artists other two images.
|
The SLR Camera
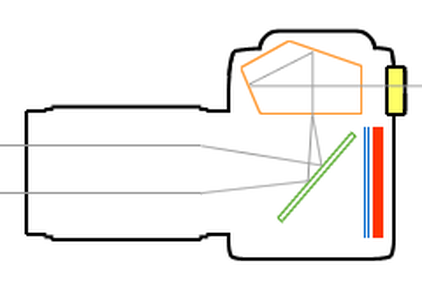
A digital single-lens reflex camera (also called a digital SLR or DSLR) is a digital camera that combines the optics and the mechanisms of a single-lens reflex camera with a digital imaging sensor, as opposed to photographic film. The Digital SLR stands for Single Lens Reflex. It works by light passing through the lens and reflecting off the mirror at the back of the camera up to a focusing screen. The light then passes through the focusing screen and enters a block of glass called the pentaprism. The pentaprism reflects the image so that you can see it in the viewfinder. When you take a photo, the mirror flips up and a shutter opens that exposes the digital sensor to light.
|
Mechanics of the DSLR
|
|
Aperture
|
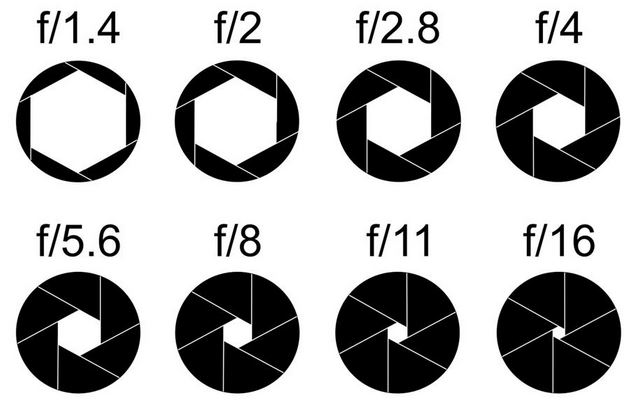
Aperture refers to the opening of a lens's diaphragm in which light passes through. It is calibrated in f/stops and is generally written as numbers such as 1.4, 2, 2.8, 4, 5.6, 8, 11 and 16. The lower f/stops give more exposure because they represent the larger apertures, while the higher f/stops give less exposure because they represent smaller apertures.
Aperture affects depth of field massively. Depth of field is the area of sharpness in front of and behind the subject on which the lens is focused. The lower the f/stop, the larger the opening in the lens, the less depth of field, so the blurrier the background. The higher the f/stop, the smaller the opening in the lens, the greater the depth of field, so the sharper the background. |
Examples
F/4 - Blurrier Background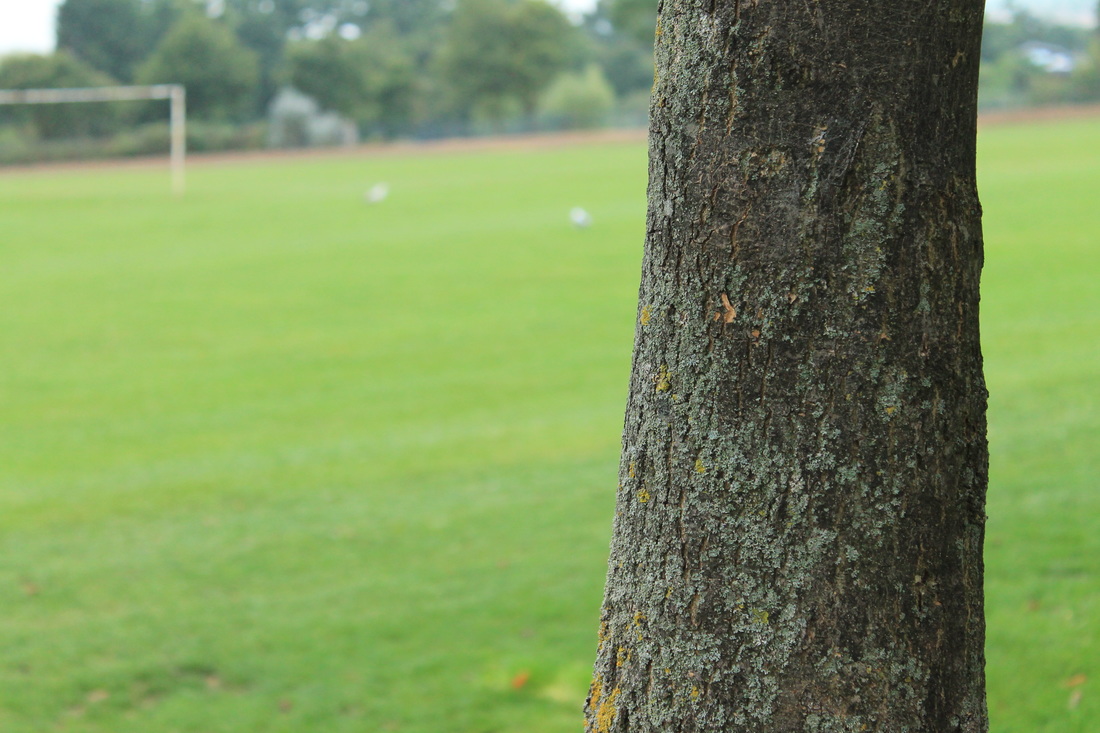
|
F/16 - Sharper Background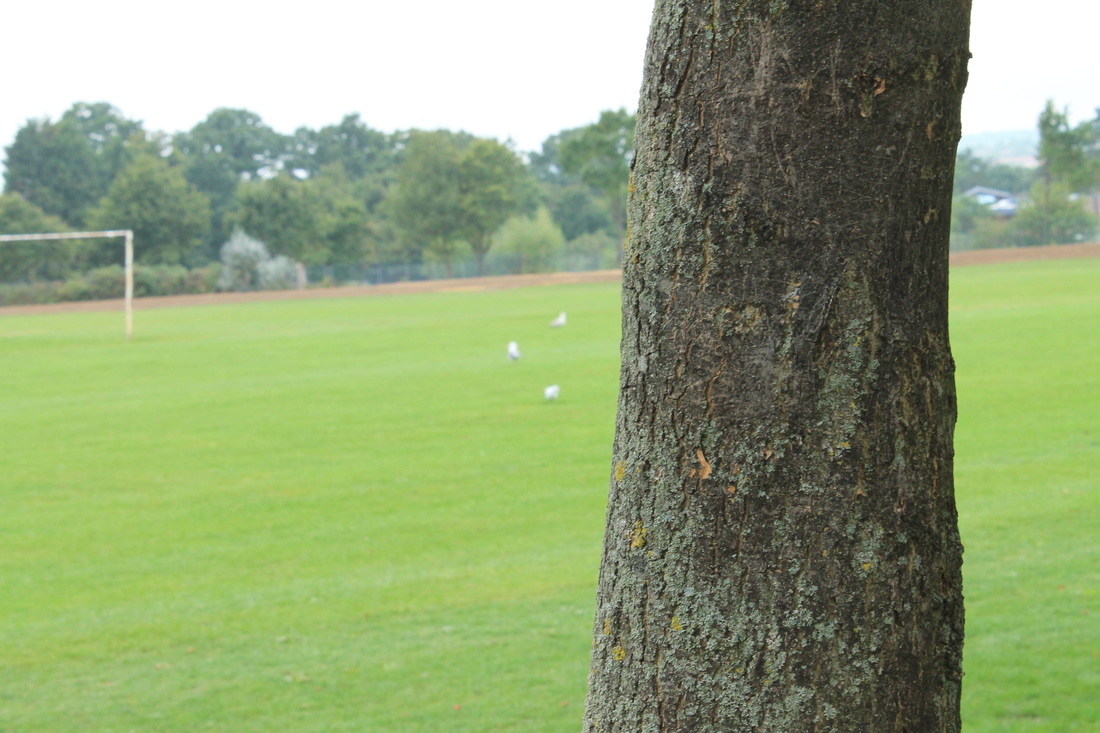
|
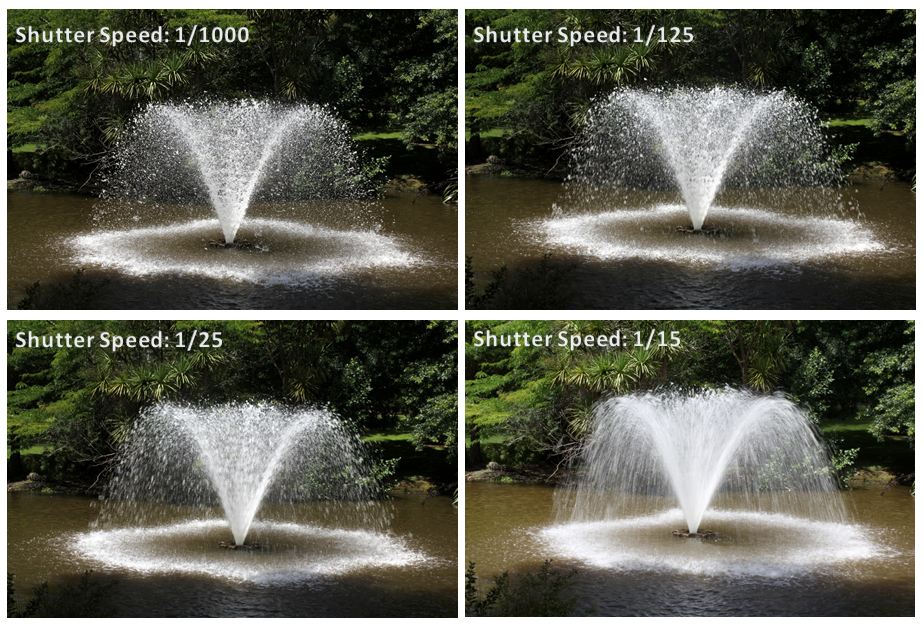
Shutter Speed
|
Shutter Speed is defined simply as 'the amount of time that the shutter on a camera is open'. Shutter speeds available to a camera will usually double (approximately) with each setting. As a result you’ll usually have the options for the following shutter speeds – 1/500, 1/250, 1/125, 1/60, 1/30, 1/15, 1/8 etc. A faster shutter speed (1/1000), usually captures motion quickly in a clear, sharp image. A slower shutter speed (1/15), will capture movement as a blur.
|
|
Examples
1/1000
1/500
|
1/60
1/15
|
The Film Camera
Prior to the digital revolution, all photographers would have used a film-based camera, which controlled the amount of light coming through the lens via a shutter mechanism and aperture, before finally reaching a strip of unexposed film. I currently use a 35mm Single Lens Reflex film camera. The term SLR refers to the way in which the light passes in through the camera lens and allows the photographer to see directly through the lens due to a mirrored shutter. When the shutter release is pressed the mirrored shutter opens and light hits the film for a certain period of time.

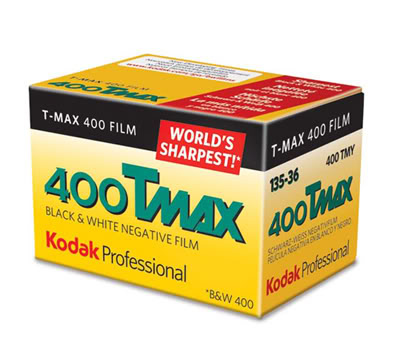
Photographic Film
Photographic film is made of a type of plastic/acetate that is coated in a light-sensitive emulsion. The sensitivity of light is measured using a unit called ISO. The lower the number, the less sensitive and more resistant the film is to light. A higher ISO means that the film is more sensitive to light and therefore needs less light to become exposed.
|
|
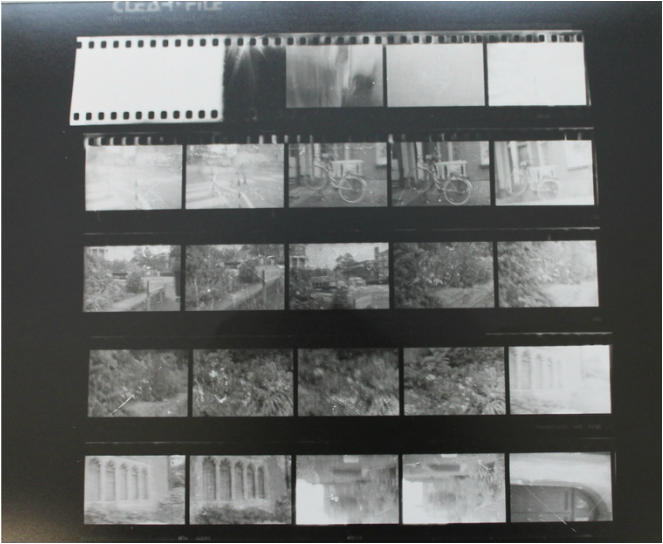
The Contact Sheet
|
|
A contact sheet is a positive print of all the negative images from one film, made by a contact printing process so that all the images are the same size as the negative. A contact sheet is a useful way of seeing which are the best images on a film so you can decide which ones to make enlargements from. The contact sheet is often described as the 'photographers sketchbook', and each sheet should tell a different story, whether it include images of people or landscapes.
|
Developing Process
- Start by ensuring that you have the following equipment:
- Developing tank/container, top and lid
- Film spool
- Spool funnel - Transfer your film to a spool in the 'Film Transfer Cupboard' in pitch black
- Once finished, turn the top part of the tank into place so the funnel is trapped and turn until you hear a click. Now, put the lid on and then turn on the light.
- Set your chemicals up in advance, ensuring that you have the right amount of film developer, stop and fix to fill the tank to the required level, which depends on the number of films. A single film spool takes 300ml of solution.
- Check the correct timings and using a timer, start the process. Remember to agitate the tank regularly (every 1 minute, turn 5 times slowly).
- The timing of the film developer will depend on the type of film being used and ISO so check very carefully or ask your teacher. TIP: To achieve a higher contrast, leave in the film developer for slightly longer than stated.
- Ensure this process: Film Developer > Stop > Fix > Running Water > Wetting Agent
- Use your hand gently to remove excess wetting agent and hang with clips at both ends in the film drier.
- Once dry, cut up into strips of five and put into your archival sleeves.
- Make a contact sheet and ensure it is placed before your archived negatives for reference.
Response
When taking images for my contact sheet, I walked around Muswell Hill and took a series of interesting photos that inspire me. I took most of the photos at a small church at the end of Tetherdown, as there are numerous different types of flowers surrounding the church that interest me.
Print From Contact Sheet
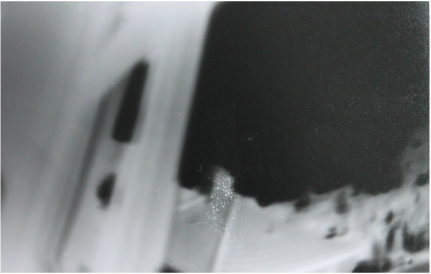
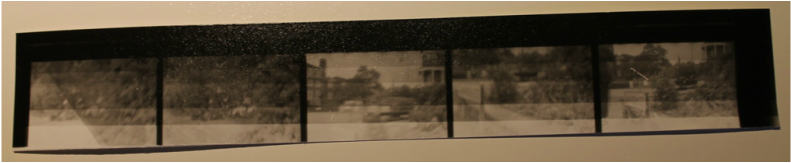
Test Strip
Using the negatives from the contact sheet, I exposed a row of negatives using the enlarger, however I placed glass over the sheet and used moved some black card along the row of negatives using 3 second intervals. This meant that the parts of the strip were more exposed to the light than others. I then developed and fixed the strip, and the result is below.
Using a magnifier and enlarger, I placed one negative into the enlarger shiny side up and exposed the film for 5 seconds. I then developed and fixed the image. Despite the printing process being successful, the image had a grainy, blurry quality and didn't quite have the clear focus I wanted. I attributed this problem to not using the focusing ring properly on the film camera when I was out taking photos. However, the grainy quality to the photo could be seen as quite effective, as it gives the image a vintage, timeless look and conveys a different atmosphere to an image that is clearer in focus. It almost looks as if the image was taken 100 years ago.

